When it comes to food there are only a few things that my sister really loves. Sure, she’ll eat and try everything I make and enjoy it, always eyeing it with great suspicion and asking “What’s in this?” There are only a handful of dishes and desserts that will make her smile and ask for seconds. I take advantage of those moments and make a mental note to remember what it is that I made. Cooking for 12 years now, I have come to realize what each one of my family members like or dislike. My sister is very picky. I don’t know if I should call her picky—mainly because she’ll read this—but perhaps I should say that she knows what she likes. She is a woman of stern belief and when she makes up her mind, she likes what she likes. There’s no budging her from this. However, I have come to learn the signs when she doesn’t care for something in particular. If she doesn’t like the way something tastes she will eat really slowly and just smile. “You don’t like it do you?” I’ll ask her. She’ll just scrunch up her face and shake her head and as cool, calm and collected as possible she’ll respond with a sly “Noooooo.” Growing up, or even now, if we go to a party or a dinner at a friend’s house she’ll just reserve whatever she doesn’t like, and when no one is looking move it over onto my plate. Lucky for her, I’m a garbage disposal. I’ll eat anything. Hey, what are little brothers for if not to eat the food you don’t like?
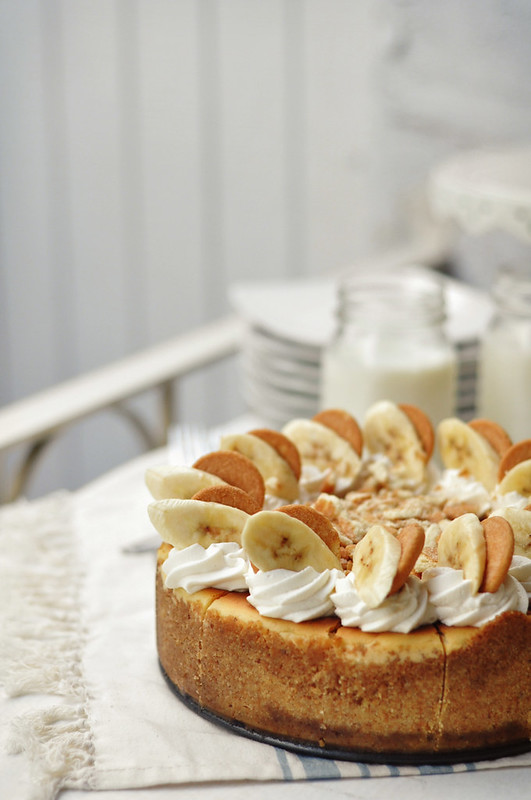
So you might be wondering what does my sister like? Well, if you weren’t wondering it pretend that you were. She will go crazy for anything with banana in it. It’s her absolute favorite flavor. Upon learning this I have made it my life’s mission to make countless desserts made with that yellow fruit. I began brainstorming this post with that idea in mind. I realized that I hadn’t made something for my sister in a long time so I wanted to dedicate a post to her. She loves cheesecake and she loves bananas, so I decided to mash the two together. The outcome is this Banana Pudding Cheesecake. Because I wanted to make it a little more sinful and take it over the edge, I decided to slap on Bourbon to the beginning of the title. I may have incorporated copious amounts of that whiskey into this dessert but I can guarantee you that you cannot taste the alcohol. You won’t get drunk from it. I wonder if it is even possible to get drunk from a dish or dessert that has alcohol in it? I’m sure one could, if the dessert was just drenched in it and wasn’t even cooked. You don’t have to worry about that here.
The cheesecake has the perfect amount of banana flavor which garnered me two thumbs up. My sister practically ate the entire thing herself, and even stole a piece I was saving for our friend. I didn’t want to point any fingers, but I’m pointing fingers. Our friend, if you’re reading this she ate it. Stole it right from the fridge and didn’t think twice about it. I even think there was a maniacal laugh involved when I told her it was for you. She just continued to gobble it away. I guess this just goes to show us how good this cheesecake actually is. And because I don’t want to start WWIII with my family, I’ll take this moment to tell my other sister that I will make her something soon. Another dedication post with her name written all over it. What could be better than surrounding yourself with delicious treats and your family close at hand to enjoy it with? Nothing else my friends, I think that pretty much tops the list.

Let’s start off with the star ingredient. The main attraction to this recipe.
Bananas. It’s B—A—N—A—N—A—S, bananas!!
We’re going to need about three bananas. Peel them and throw them into a large bowl.

**Note: You can use very ripe bananas if you’d like. That will just give your cheesecake an extra sweetness. I don’t like my banana pudding to be extra sweet and I feel like the cheesecake overall has the perfect amount of sweetness already, so I tend to use bright yellow, not so ripe, bananas. But the decision is up to you.**
Then give the bananas a smash with either a fork or a tater masher.


Smash it until it’s completely broken down, almost totally smooth. It can be slightly chunky if you’d like. I like my cheesecakes to be very smooth so I mashed the bananas all the way.
Add the mashed bananas to a small sauce pot, and place it over medium heat.
Cut a lemon.

Squeeze half of it right into the bananas.
Don’t waste the other half of the lemon! Make sure you use it for something else. I think this would be a great excuse to make guacamole with lemon. Or a Caesar salad dressing with lemon. Or hummus with lemon. If worse comes to worse just squeeze some lemon into a glass of water and drink it.
Oh oh oh better yet, slice the other half and add it to your glass of water. And you think you can’t be fancy. Psssh you can be fancy.


Now we need some brown sugar.
You can use granulated sugar if you’d like or if you don’t have any brown sugar on hand. I just feel like bananas go so well with brown sugar, so that’s what I used.

Add it to the pot as well and give it all a stir, allowing the brown sugar to melt into the bananas.


Allow the mixture to cook for about a minute, stirring constantly to make sure that it doesn’t stick to the bottom of the pot. P.S. Mine stuck a little to the bottom because I have an old pot—Santa if you’re reading this, hint hint, I need new pots for Christmas—so if it sticks a little it’s okay. Don’t panic. I panicked for a millisecond and then thought to myself “Self, it’s okay. It’s not the end of the world if the banana sticks a little.”
Now we’re going to be a little naughty. Or should I say, I’m going to be a very bad influence and say that you must add some bourbon to this. Bourbon will give this cheesecake unbelievable flavor.
**Note: I don’t want you to think that you’re going to get drunk if you add it. That’s not at all possible. Adding the bourbon now, at this stage while the banana cooks, will allow the alcohol to cook off. Leaving you with nothing but fantastic bourbon flavor. Of course if you want to be a stuffed shirt and not add alcohol don’t have any bourbon on hand, you don’t have to add it. You can just use vanilla extract instead.**


Give it one more final stir and remove the pot from the heat.
Move it off to the side and allow it to cool down completely. And I do mean completely. Now is not the time to be impatient and just wing it while it’s still warm. We’re going to be adding this to tons of cream cheese and eggs so we need it to be completely cold.
I’ll know if you don’t let it cool down completely, so don’t even think about it.

While our banana concoction cools down let’s turn our attention to the best part of cheesecake. And we all know what that is, the crust.
Yes, the crust is the absolute best part of a cheesecake. Or pie. Or tart. Whoever invented it deserves a Nobel prize or a statue erected somewhere. Perhaps a national holiday? I think so, I think so.
Because this is a Bourbon Banana Pudding Cheesecake, and traditional banana pudding uses vanilla wafers (Nilla Wafers), that’s what we are going to use for our crust.
**Note: If you live somewhere where Nilla Wafers aren’t available to you or if you don’t have any idea what the hell I’m talking about and are like “What in the world is a Nilla Wafer?” or if heaven forbid you don’t like Nilla Wafers (gasp here) then feel free to use graham crackers. Or ginger snaps. Or whatever else you like for your crusts. You can also make this gluten-free if you use gluten-free gingersnaps instead.**
In a bowl of a food processor, dump in the Nilla Wafers, or whatever type of cracker/cookie you are using.
Also throw in the pecans. Or pecons if you will. I like the flavor and texture the pecans give the crust.


Pulse the cookies and pecans until they are nothing but crumbs.
Pulverized edible dust.


**Tip: If you don’t have a food processor, you can throw the cookies and pecans into a large food storage bag and give it a whack with a rolling pin or a heavy duty pot. You’ll get out a lot of anger and stress that way. I highly recommend it.**

Once you’ve got the crumbs, turn on the food processor and stream in the melted butter.

The crumbs should become very moist and clump together. If it appears to be too dry, add a little more melted butter.
But add it a little at a time because once you add too much that’s it, you can’t take any back.
You can’t say “Oh I didn’t mean to add that much butter. I made a mistake. DO OVER. Rewind. Sadly, cooking doesn’t work that way. Believe me I’ve tried.
What were we talking about? Oh that’s right moistened crust crumbs.
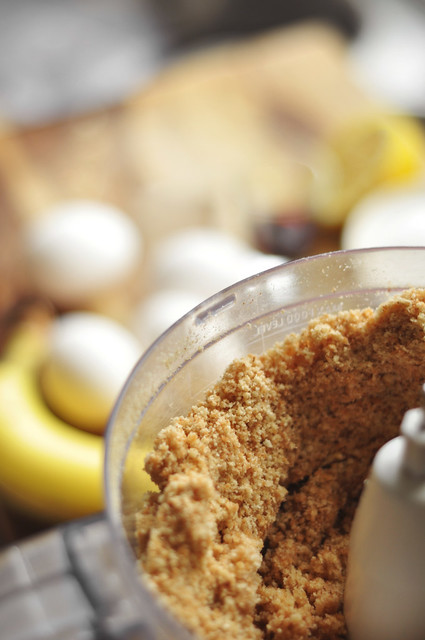
Dump the crumbs into a lightly greased springform pan. Lightly greasing it will allow the cheesecake to come off easily from the pan.
Also take note of the aluminum foil. This is very crucial. Later on we’re going to bake the cheesecake in a water bath so that the steam allows it to cook and not crack at the top. The aluminum foil will prevent any water from seeping in and sogging up the crust. I don’t want soggy crust, I want crispy crust and something tells me you do too.

Use your hands or the back of a spoon to flatten out the crumbs and press it onto the bottom and sides of the pan. I love it when cheesecake crusts go all the way up the sides. So that’s what I did here.

You can use your hands to begin to form the crust but then a good trick is to switch to a measuring cup. That will flatten out the crust nicely for you.


Bake in a preheated 350°F for ten minutes. You’re not trying to brown the crust or bake it completely, it’s just to set the crust and allow it to crisp a bit before adding the filling.
After ten minutes, remove it from the oven and allow it to cool completely. Again, don’t try to take any shortcuts and just add the filling while the crust is hot to save time because the only thing you’ll do is ruin the cheesecake. It’ll cook unevenly. And then everyone will look at you, angrily and say “Thank you SO much for ruining the cheesecake!” They’ll throw things at you for messing up their lives. You don’t want that do you?
But I’ll tell you what, I’ll give you a little trick. You can place the crust in the freezer and allow it cool down in a short time. Although we haven’t even made the filling yet so you don’t have to worry about that. By the time the filling is down the crust should be good to go.
Okay now for the filling.
We’re using the stand mixer now. I don’t have the strength or the time and patience to mix this by hand.


Throw in the cream cheese into the bowl. The cream cheese has got to be, just has to be at room temperature. This will allow for a very smooth cheesecake and it will blend easier for you.
Now I know that’s a lot of cream cheese up there. It’s only four bricks though. Pssssshhhh….that’s nothing. I put that on my bagel every morning. It could be worse, we could be using 5 bricks. Count your blessings I’m only asking for four.
Also don’t come around trying to make this with fat-free or reduced fat cream cheese. That is not going to fly here. There is no such thing as a “light” cheesecake. If you’re going to have cheesecake, have a really good cheesecake. It needs to be whole-fat, good ol’ ordinary cream cheese. It’s the only way.
If I find out you made this with fat-free cream cheese I will go over and throw it onto the floor before you even have a chance to eat it. Believe me, I’d be doing you a favor.
Turn on the mixer and whip the cream cheese for a few minutes.


Whip the cream cheese until it is light and fluffy.
Like a bowl of fluffy white clouds of delicious whole fat creamy goodness.

Because this isn’t decadent enough, it’s time to add the sugar.
While the mixer is running, slowly stream in the granulated sugar.


Scrape down the sides and bottom of the bowl and cream together for a few minutes.
Okay, we need to throw this cheesecake over the edge. We need to add the eggs.
Whole eggs.
And a lot of them.

It’s not really a lot of eggs. It’s just four.
Add them one at a time to the creaming sugar and cream cheese.
Add one, mix. Pause. Add another, mix. Pause. Add the third, mix. Pause. And add the final one. Mix.


Once all the eggs have been added, continue to mix the filling for a few minutes more, until it is light and fluffy.
I’m using “light and fluffy” a lot on here, but it’s the only way to describe this cheesecake.


Add the bourbon. Quick, hurry before someone sees you.
Of course you can just use vanilla extract if you’d like.


Mix until everything is completely smooth and well incorporated.

Now it is time to add the banana mixture from earlier.
Don’t tell me you forgot about it! We need it so that this cheesecake becomes a banana pudding cheesecake.
At this point the banana mixture should be cold. Add it.

Give the cheesecake filling one final mix to incorporate the banana concoction.


Okay so as promised, the crust should be cooled by now.
Let’s look at our baked and cooled crust.

Pour all of the filling into the pan, on top of the crust.
Resist the urge and temptation to eat the filling before it bakes. I mean if some happens to land on your finger and you need to lick it off well that’s okay I guess. Although there are raw eggs in the filling so try at your own risk.

Place the filled cheesecake into a large roasting pan or a shallow baking dish where you can add water to it. I just use my turkey roasting pan from Thanksgiving. Might as well give it another useful purpose other than just roasting turkey.
As I said earlier, we are baking the cheesecake in a water bath. It will prevent the top from cracking and it will steam the cheesecake simultaneously while it bakes. Giving you a moist perfectly cooked cheesecake.
Oh also make sure the water is hot because if you use cold water it’ll take a while for it to come to temperature in the oven.


Bake the cheesecake in a preheated 350°F for about an hour. Check it periodically after 40 minutes. You’ll know it is ready when it doesn’t jiggle in the middle. It should be firm.
If you find that your cheesecake is browning rather fast and isn’t done baking yet, then reduce the temperature to 325°F.

When it’s done, remove the cheesecake from the oven. Drain out the water, and place it on a cooling rack to cool down completely. Remove the foil paper and place the cheesecake in the fridge to chill for at least 8 hours.
I know I know it’s torturous to have spent all this time making this wonderful cheesecake and you can’t even eat it yet. To me, cheesecake has to be chilled. The 8 hours in the fridge allow it to firm up and get cold and the flavors to develop.
My suggestion would be to make this early in the morning so it’s ready by the evening. Or you can make it the night before and have it chill over night. Then when you awaken bright and early, you can have a slice of cheesecake waiting for you for breakfast.
So let’s pretend 8 hours has passed and the cheesecake is now chilled to perfection. Here in the internet world, time flies so we don’t have to wait.
Remove the side part of the springform pan.
In the bowl of an electric mixer add the chilled heavy cream and whip on medium.


While the cream is whipping, slice the cheesecake into even slices.
I’ll leave it up to you as to what size the pieces should be, that will determine the amount of slices you’ll get.

**Tip: Use a serrated knife, wiping the blade after each slice, to make the cutting of the cheesecake a lot easier on you.**
When the cream begins to thicken, add the powdered sugar.

Add the bourbon, or vanilla extract if you’d prefer.

Raise the speed to high and whip the cream until it forms soft peaks.

**Note: Be careful to not overmix the whipped cream because it could easily turn into butter right before your eyes. In a heartbeat. An instant. A quick second.**

Okay the bourbon whipped cream is all done.
Or vanilla whipped cream if you decided to go the “good” route.
So grab your sliced cheesecake.
As you can see I didn’t do such a great job on cleaning the knife after each slice. To be perfectly honest I forgot a few times.

Shhh don’t tell anyone. With the garnishes and decorating, no one will be the wiser.
Pour the whipped cream into a piping bag fitted with the star tip.
**Tip: If you don’t have a piping bag with decorating tips, don’t worry, you can still make this look nice. Just pour the cream into a large plastic food storage bag and cut off one of the corners.**
I like to pipe a swirl of whipped cream on each slice, like so…


And because we want people to know that this is a “banana pudding” cheesecake, we’re going to top each whipped cream rosette with a Nilla Wafer cookie. It’s also to create more texture, but really it’s about me finding a way to eat cookies and cheesecake all at once.


You might think it’s all pretty and we’re done now, we can eat it right? No! We’re not done yet! I mean come on, what are you thinking?
I’m a perfectionist when it comes to these things SO I want it to be perfect. It’s still missing another garnish. Some bananas.

Slice a banana anyway you’d like, either on a diagonal or straight down into even slices. I like the diagonal.
Put the slices into a bowl and squeeze a bit of lemon juice into it. Give it a toss.
This will prevent the bananas from turning brown quickly.

Then just place a banana slice alongside the Nilla Wafer cookies on each slice.

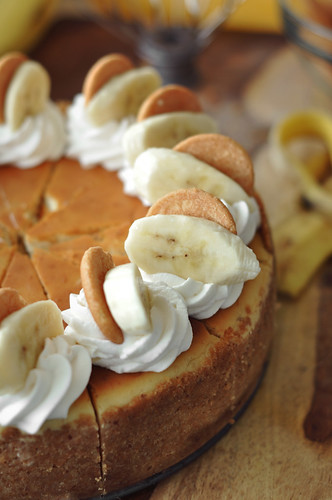
One final thing….which is completely optional…but I like to crumble, yes crumble, a few Nilla Wafers right into the middle. Just grab a handful and crush them in the center of the cheesecake.
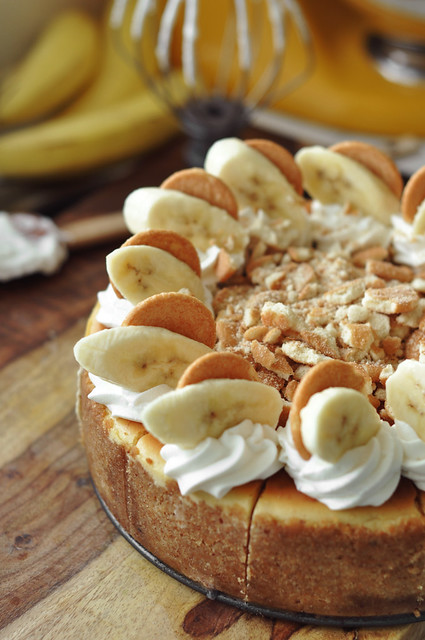
Okay there, now we’re done. And no one can see the wacky uneven slices I made.
You can take the cheesecake now and serve yourself a slice. Then you can hide it from your friends and family and enjoy it all yourself. It’ll keep in the fridge for a few days.
But if you are not selfish like me when it comes to cheesecake then you can share with everyone around you. Start handing out slices to the mailman, the gardner, coworkers…really anyone who crosses your path. They’ll thank you for it. You’ll be famous for handing out cheesecake to people.

It’s a funny thing really, I didn’t grow up liking cheesecake. As a kid, I felt it was very thick and rich and cheesy. Don’t get me wrong, I loved cheese, still do as a matter of fact, but it was just too overwhelming when I was younger.
It wasn’t until recently when I’ve started making them myself, that I’ve really begun to appreciate the wonderful majestic powers that cheesecakes possess. And I know what you must be thinking, I’m probably only saying that I like cheesecake now because I’m eating the ones I’ve made. You are right. That’s probably the only reason. But really, I think my flavors have just matured. I’m an adult now.

If you still have cheesecake left over just wrap it with plastic wrap and store it in the fridge. You may find that the Nilla Wafers will begin to get soggy because of the moisture. You can just swap them out right before you’re going to serve it.
Or only garnish the pieces you know you will eat right away.

I’m going to go on the record to say that this is my all-time favorite cheesecake. I’ve made up my mind and decided to grant this particular Bourbon Banana Pudding Cheesecake the luxury of being referred to as my favorite.
That is until I make another cheesecake which I’ll inevitable call my favorite as well.
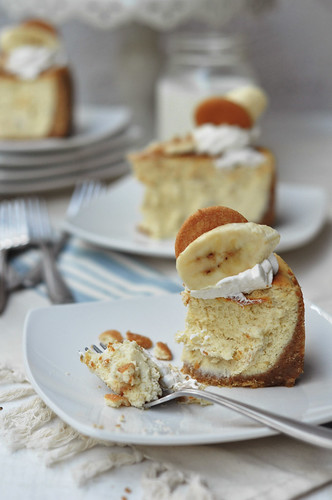

By this point in every post I feel like I’ve talked your ears off. Or written you all into boredom, I guess I should say since I’m not really talking but it feels like I am. Like you’re over and we’re having a chat you and I.
I’ve nothing else to say other than to make it for yourself. Give it a try. Make it for your family and friends and have it be the centerpiece for your next gathering. People will pat you on the back and say “good job.” Maybe you’ll get a statue erected as well. Probably not, but you never know. If you do get a statue put up I think my name should be on the inscription as well, after all I paved the way for it to happen. That’s J-O-N-A-T-H-A-N M-E-L-E-N-D-E-Z, in case you were wondering.
Enjoy!
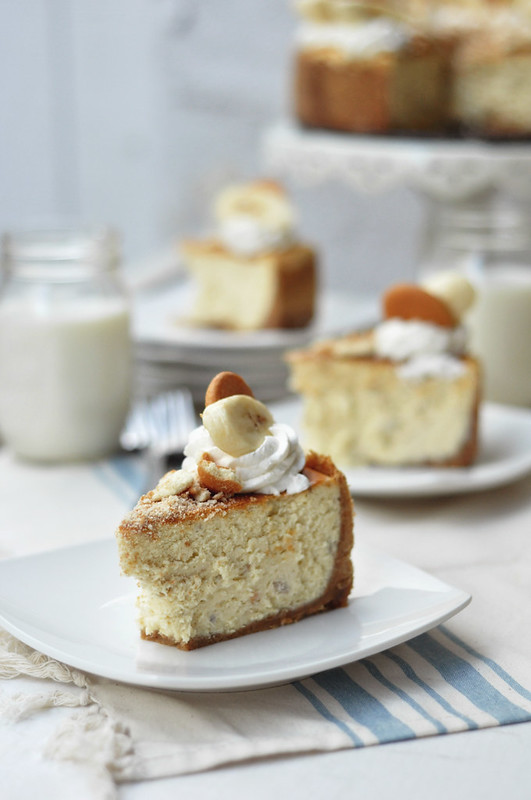

BOURBON BANANA PUDDING CHEESECAKE
This recipe can easily be made with vanilla extract, if you wish to omit the bourbon. This could also be made into a gluten-free dessert if you make it with gluten-free ginger snaps for the crust.
Yield: 8-10 servings, depending on the size of the slices
INGREDIENTS:
- 2 cups finely crushed vanilla wafers (or graham cracker crackers, or ginger snaps)
- ½ cup chopped pecans
- ½ cup (1 stick) unsalted butter, melted
- 3 large ripe bananas
- 1 tablespoon lemon juice, freshly squeezed
- ¼ cup light brown sugar
- 1 tablespoon bourbon whiskey (or 1 teaspoon vanilla extract)
- 4 (8 ounce) packages cream cheese, softened
- 1 cup granulated sugar
- 4 large eggs
- 1 tablespoon bourbon whiskey (or 2 teaspoons vanilla extract)
- ½ cup roughly crushed vanilla wafers
- 1 cup heavy whipping cream
- ¼ cup powdered sugar
- 1 teaspoon bourbon whiskey (or 1 teaspoon vanilla extract)
- 1 banana, sliced (for garnish)
PREPARATION:
1. Preheat oven to 350°F. Grease a 9-inch springform pan and wrap the outside with aluminum foil. Set aside.
2. In a food processor, pulse the crumbs and pecans until they are finely chopped. While the processor is running, stream in the melted butter and pulse until the crumbs are moist and come together. Dump the crumbs into the prepared pan and pat down with your hands. Form the crust with the back of a spoon or a measuring cup, making sure to flatten out the bottom and bring the crumbs up the sides of the pan. Bake in preheated oven for 10 minutes. Remove and allow to cool completely.
3. In a small sauce pot, mash the bananas until they are completely mashed and smooth. Add the brown sugar and lemon juice. Cook over medium heat for a few minutes until the sugar has melted and the bananas cook slightly. Remove from heat and add the bourbon or vanilla if using. Mix and allow to cool down completely.
4. In the bowl of an electric mixer, fitted with the paddle attachment, whip the cream cheese for 2 minutes, until light and fluffy. Slowly stream in the granulated sugar and continue to cream together for another 2 minutes. Add the eggs one at a time, mixing well after each addition. Add in the bourbon or vanilla extract if using. Scrape down the sides and bottom of the bowl, mix again. Stir in the banana mixture until just incorporated. Spread the filling over the crust and place in a roasting pan. Pour hot water into the larger roasting pan going half way up the springform pan. Bake in a 350°F oven for about 45 minutes to 1 hour. It may depend on your oven. You’ll know the cheesecake is done when the center is firm and doesn’t jiggle when shaken. If you find that the cheesecake is browning rapidly before being down, lower the oven slightly. Once done, place on a cooling rack and allow to cool down completely. Place in the fridge and chill for at least 8 hours.
5. In a large bowl add the cold heavy whipping cream. Beat until the cream begins to thicken. Add the powdered sugar and bourbon or vanilla extract if using. Continue to beat until the cream forms soft peaks. Cut the cheesecake into slices and pipe whipped cream onto each slice. Top with a vanilla wafer cookie and a banana slice. Sprinkle the middle of the cheesecake with the crushed vanilla wafers. Serve right away. Store any leftovers in the fridge covered with plastic wrap. Will keep for up to 5 days. Enjoy!!